In this Blog, we will explain the steps to fabricate your own private helm repo using simple web server and php.
Few basics about helm chart
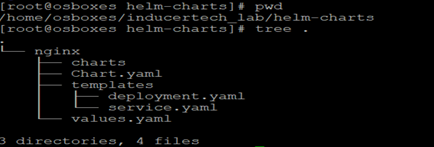
Lets have look at the basic structure of your helm chart before getting into details.
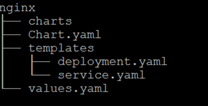
Chart.yaml holds metadata of the helm chart. This will be used by helm repo to incorporate chart info in repo metadata.

values.yaml à configurable variables/Kubernetes object attribute.
Templates à This folder contains all the Kubernetes object definition which would create upon execution of the helm chart
Few basics about typical helm repo
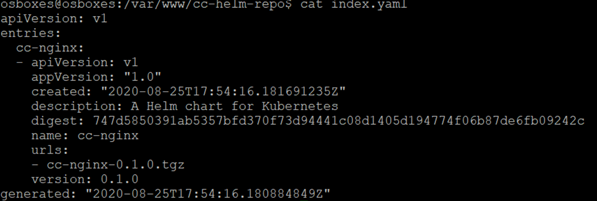
- Typically helm repo host the repo metadata in a form of index.yaml and all the helm chart in gz form.
- We have to make sure that index.yaml would available over http with basic auth to helm clients who would be reading the helm charts from the repo.
- We have to have a utility to upload new/updated helm charts into repo using simple utility(possibly using curl).
- We also have to rebuild helm repo metadata(index.yaml) upon chart upload.
Let’s get into actual fabrication.
I’ve used ubuntu for this fabrication but this could be fabricated using any flavor of OS with modification of installation steps inline with the OS. Also I’ve chosen of the high performing modern web server, the NGINX. We would perform below steps to fabricate the private helm repo.
- Install NGINX.
- Install htpasswd for basic authentication & create auth password file.
- Install helm client(only to build repo index.yaml).
- Install PHP and write a simple php helm upload utility
- Configure NGINX.
- Test.
Step 1 : Install NGINX
#Install NGINX
sudo apt install nginx
# Enable firewall if needed.
Step 2: Install htpasswd and create the auth file
#enable auth
sudo apt install apache2-utils
# Please make sure apache2 service is not running.
sudo systemctl status apache2
#Please stop and disable it if running
# sudo systemctl stop apache2
# sudo systemctl disable apache2
#create a password file
sudo htpasswd -c /etc/nginx/conf.d/.htpasswd ccuser
#you will be prompted for password. Enter password of your choice. For example ccpass@123
#Inspect the password file
cat /etc/nginx/conf.d/.htpasswd
Step 3: Install helm client(only to build repo index.yaml).
#Please execute the below command to install helm3
curl https://raw.githubusercontent.com/helm/helm/master/scripts/get-helm-3 | bash
#Please check your installation
helm version
Step 4: Install PHP and write a simple php helm upload utility
#Install PHP
sudo apt install php php-cli php-fpm
#check for php-fpm.sock. In my case its php7.4-fpm.sock

sudo ls -lr /var/run/php/
# Check service status
sudo service php7.4-fpm status
#Check and modify below entry of www.conf of fpm
sudo vi /etc/php/7.4/fpm/pool.d/www.conf
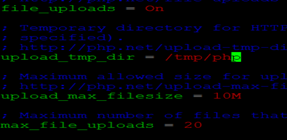
#create a tmp folder for php
sudo mkdir -p /tmp/php
sudo chmod 777 /tmp/php
#check and update the below entry of php.ini
sudo vi /etc/php/7.4/fpm/php.ini
#restart the fpm service
sudo systemctl restart php7.4-fpm.service
#check the status
systemctl status php7.4-fpm.service
#Now, create a data folder to store the charts. This you could mount to external cloud/object storage.
sudo mkdir -p /var/www/cc-helm-repo
#Create a small utility to handle upload
sudo vi /var/www/cc-helm-repo/uploadChart.php
#paste the below code.
<?php
$uploaddir = ‘/var/www/cc-helm-repo/’;
$uploadfile = $uploaddir . basename($_FILES[‘chart’][‘name’]);
try{
if (move_uploaded_file($_FILES[‘chart’][‘tmp_name’], $uploadfile)) {
echo shell_exec(“helm repo index .”);
echo “Chart was successfully uploaded.\n”;
print_r($_FILES[‘chart’][‘name’].”\n”);
}else {
echo “Possible file upload attack!\n”;
}
} catch(Exception $e){
echo ‘Message: ‘ .$e->getMessage();
}
?>
Step 5: Configure NGINX.
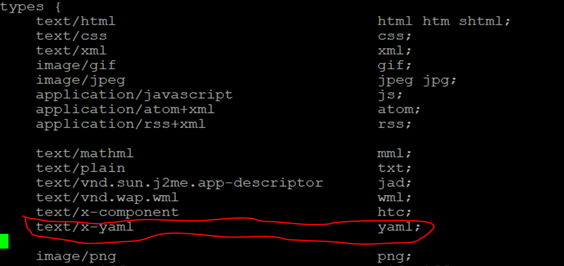
#enable yaml mimetypes
sudo vi /etc/nginx/mime.types
#add the below entry
# Do the following modification in the below file
sudo vi /etc/nginx/sites-available/default
#Enable PHP for NGINX
location ~ \.php$ {
try_files $uri =404;
fastcgi_pass unix:/var/run/php/php7.4-fpm.sock;
fastcgi_index index.php;
fastcgi_param SCRIPT_FILENAME $document_root$fastcgi_script_name;
include fastcgi_params;
}
# Adjust the side root folder and index file
root /var/www/cc-helm-repo;
# Add index.php to the list if you are using PHP
index index.php;
# add the htpassed file to enable basic http authentication
listen 80 default_server;
listen [::]:80 default_server;
auth_basic “Restricted Access!”;
auth_basic_user_file /etc/nginx/conf.d/.htpasswd;
#make chartUpload file as index file
sudo mv /var/www/cc-helm-repo/uploadChart.php /var/www/cc-helm-repo/index.php
#restart the nginx
sudo systemctl restart nginx
#check status of the nginx
sudo systemctl status nginx
#Our helm repo is ready now.
Step 6: Test the helm repo
Please use another system with helm and Kubernetes cluster access. Also keep few helm chart ready for testing. You could download few from public git repo. I’ve used a basic helm chart to install nginx and create a cluster ip service.
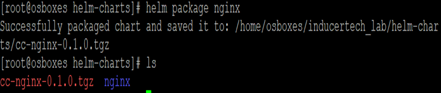
#Lets package the chart
#helm package <chart_folder>
helm package nginx
#Upload the chart into our helm repo using curl utility
# curl -X POST -H ‘Content-Type: multipart/form-data’ -u <repo user>:<repo password> -F ‘chart=@<path/to/chart.tgz>’ <repo url>
curl -X POST -H ‘Content-Type: multipart/form-data’ -u ccuser:ccpass@123 -F ‘chart=@./cc-nginx-0.1.0.tgz’ http://192.168.56.107

#Now, add the helm repo
# helm repo add cc-helm-repo <repo url> –username <repo user> –password <repo password>
helm repo add cc-helm-repo http://192.168.56.107 –username ccuser –password ccpass@123
#update the helm client repo
helm repo update
#inspect the helm chart @repo
helm search repo nginx

# Install helm chart from repo
Kubectl create ns test-helm
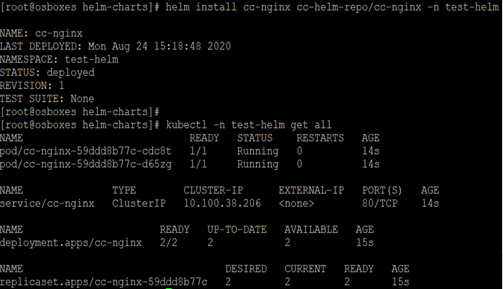
helm install cc-nginx cc-helm-repo/cc-nginx -n test-helm
kubectl -n test-helm get all
#Uninstall
# helm uninstall cc-nginx -n test-helm
#delete the test namespace
# kubect delete ns test-helm
If could able to perform the above test step with the shown output then the helm repo is ready to use.
Git Repo: https://github.com/shamim909/tit-helm-repo.git
In part#2 of this blog, we would containerize the above repo and deploy in Kubernetes.